THIS BLOG IS DEDICATED TO THE PRESERVATION AND RESTORATION OF BRITISH AUTOMOBILES

Wednesday, May 20, 2015

FITTING THE BUMPERS AND GRILLE

Morris is beginning to resemble the beautiful automobile it was when it was new.  It is difficult for some to visualize the end result when restoring a car, but Lori and Bill and our team seem to have that talent.
Today, Glenn and I fitted the bumpers and grille.  Now, all that remains is the bonnet and the glass.


The grille and bonnet release mechanism was a bit difficult to assemble, but the end result is quite stunning.
Tomorrow, we will be fitting the door latches and windows.  We will also be installing the new Moto-Lita steering wheel and horn assembly.


I love this car...
Tommy's Topless Cars
843-338-2253


Tuesday, May 19, 2015

ENGINE START-UP

The start-up went very well, with only a few issues.  The fuel pump, shown in the photo to the left,  appeared to be new.  However, it did not function properly.  Fortunately, I had one in stock that had been previously used on an MGB.  We installed it and Morris started almost immediately.  Tomorrow, we will replace it with a new one and continue the break-in.


The Morris Minor 1000 was not fitted with oil pressure and water temperature gauges.  Bill requested that a Smiths combination oil and water gauge be installed in close proximity to the driver's line of sight.  I had a new one in stock and we installed it today.  It was a bit time consuming, but the end result was certainly worth the effort.  

Stay tuned...
Tom McCurry
Tommy's Topless Cars
843-338-2253

Monday, May 18, 2015

PREPARING FOR START-UP...CONTINUED

Today, Glenn and I spent the day going through the checklist and preparing the equipment for start-up.  
The accelerator cable, choke cable, fuel filter,  accumulator and radiator have been installed.  Also the necessary adjustments have been made to the carburetors and accelerator linkage.
Tomorrow morning, we will be initiating the start-up procedure.  Our engine builders, Paul and Ron will be supervising.


Are you excited???
Tom McCurry
Tommy's Topless Cars
843-338-2253


Sunday, May 17, 2015

PREPARING FOR START-UP

Starting a new engine for the first time can be quite challenging.  As you can see, there are many connections that must be made correctly or serious damage to the engine may result. Over the years, we have developed a checklist which prevents the omission of any of the critical procedures.


Shown in the photo to the left is the temporary installation of the radiator and its support.


As a bonus, I spent a few more minutes installing the grille and its shell just to make sure we like the color scheme.


Thanks for watching
Tom McCurry
Tommy's Topless Cars
843-338-2253


Saturday, May 16, 2015

INSTALLING THE LIGHTING

Occasionally challenging and frequently frustrating, the lighting system on a British car is usually time consuming.  As you can see in the photo to the left, the headlights and park lights have been installed and the wiring connected.


The taillights have also been fitted and connected.  Amazingly, when we connected the battery, nothing worked.  However, as it turned out, we were in the dark due to poor ground wire connections.  
All the ground connections are made to the body's sheet metal and obviously all those surfaces have been freshly painted.  Therefore connecting ground wires to the body requires additional effort.  We used star washers on all the grounds which pierce the paint and create an excellent metal to metal connection.


Stay tuned...
Tom McCurry
Tommy's Topless Cars
843-338-2253


Friday, May 15, 2015

MAKING CONNECTIONS

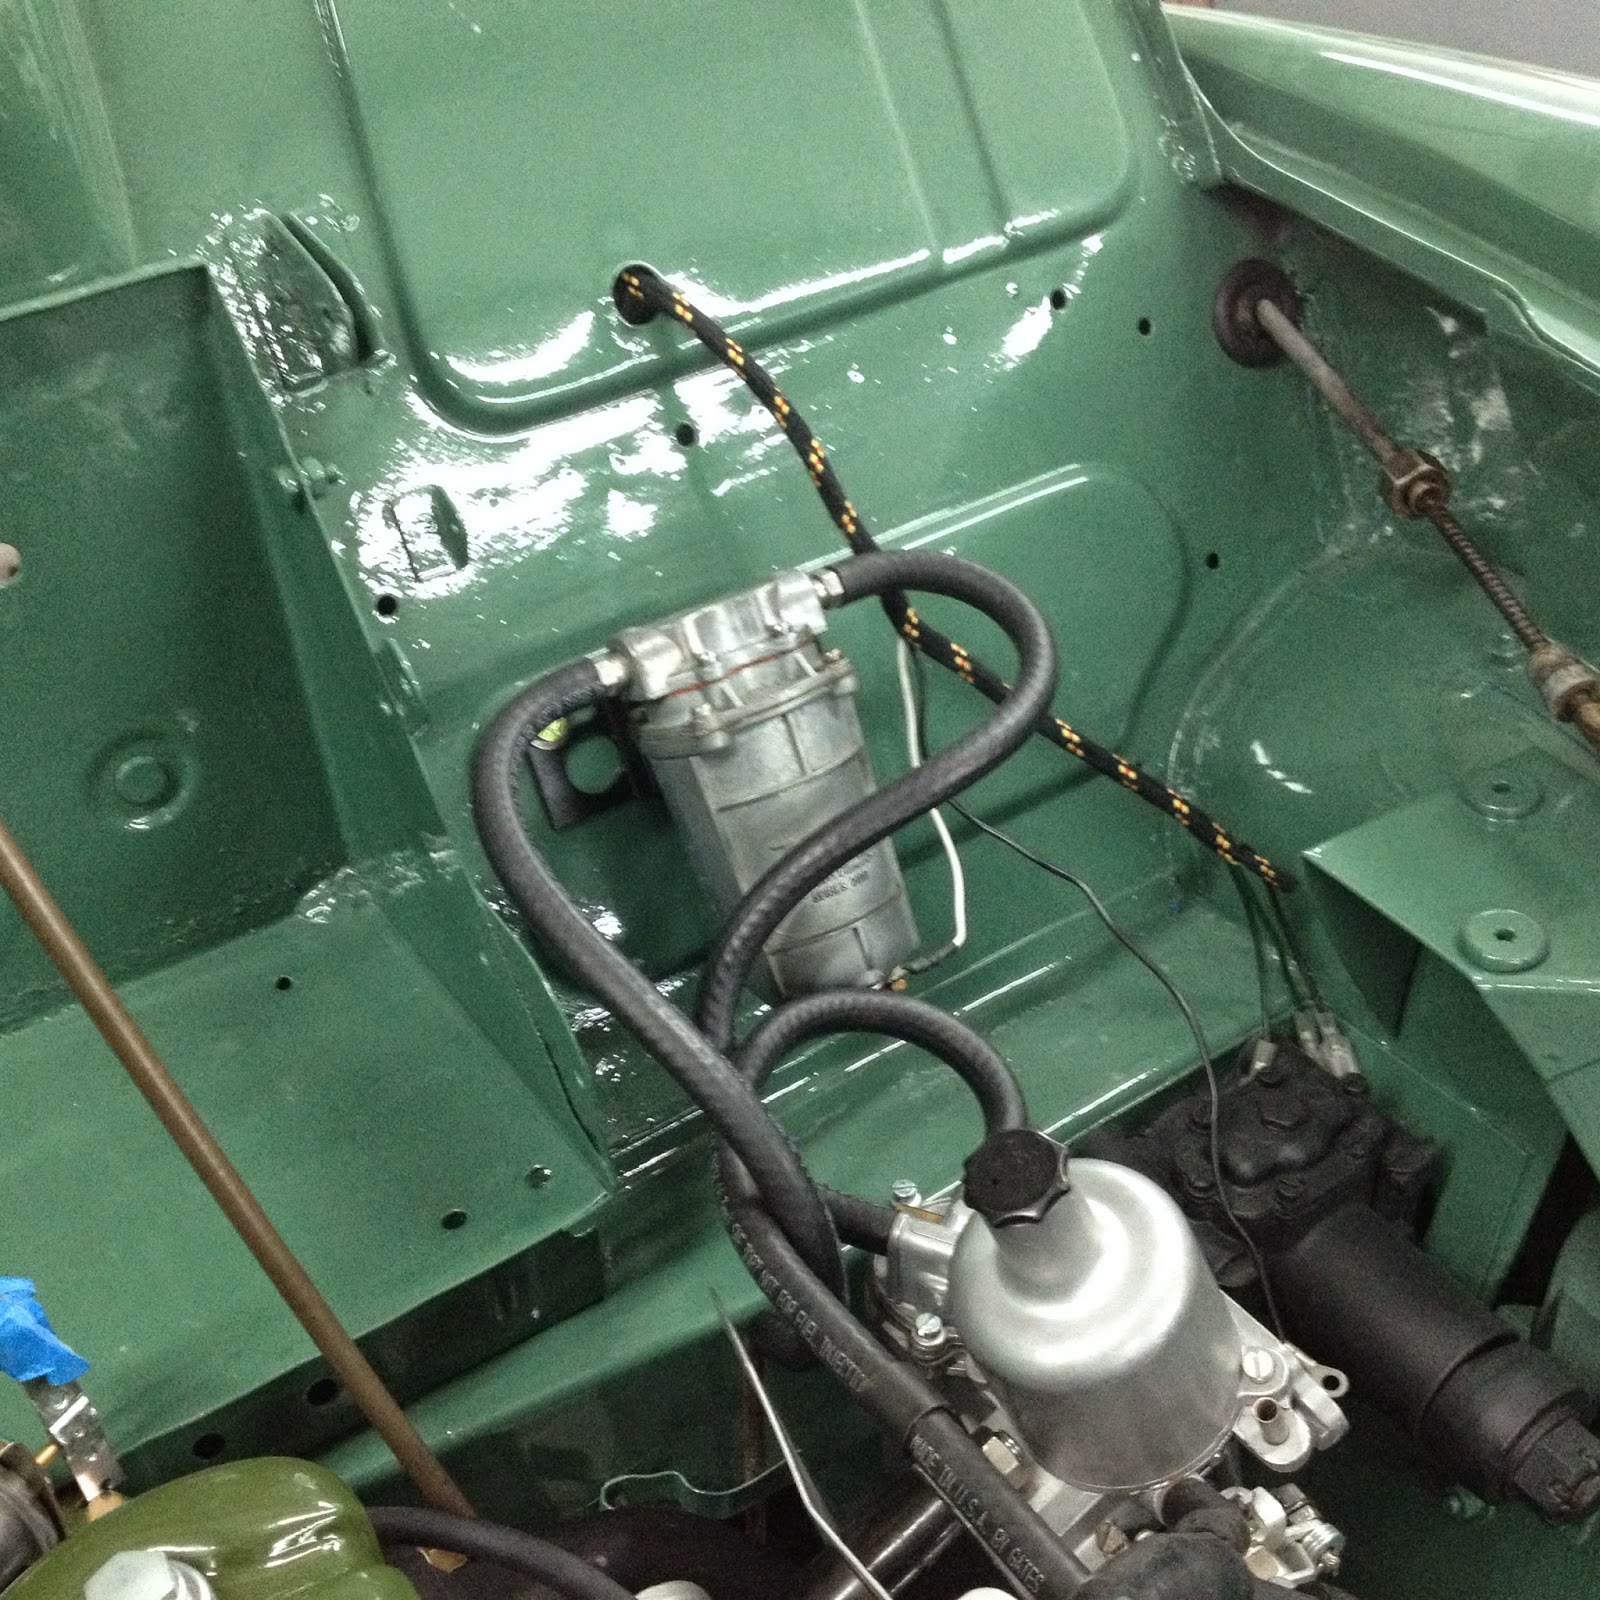
There are so many connections to make; fuel lines, carburetor linkage, heater hoses, cooling system hoses, heater blower hoses, and last but not least...wiring.
Pictured to the right is the electric fuel pump and the supply and discharge hoses leading to the carburetors.


In the photo to the left, you will notice the heater hoses, battery cables, cooling system hoses and starter wiring has been connected.
It has been an eventful week.  Last Saturday morning the paint was applied and we began assembling the drive train on Monday.  


It's coming together..
Tom McCurry
Tommy's Topless Cars
843-338-2253


Thursday, May 14, 2015

THE ENGINE COMPARTMENT

Now that the engine and transmission are in place, we are focused on the wiring.  The new wiring harness is a thing of beauty.  All the connectors are in the proper place and the wires are the correct colors.


The voltage regulator, flasher and fuse box have been installed.


The heater blower and horn have been installed and the blower tubes connected.  These are all original to the car and as you can see they are in exceptional condition.


I love this car...
Tom McCurry
Tommy's Topless Cars
843.338.2253


Wednesday, May 13, 2015

FITTING THE INTAKE AND EXHAUST MANIFOLDS

The exhaust manifold, which was made especially for the Morris Minor with the 1275 cc conversion, fit perfectly.  But as you can see, the header extends horizontally from the mounting flanges instead of turning down as most headers do.  


When we fitted the intake manifold, we realized that the heat shield would not clear the exhaust header without some modification.


After the alterations were made to the heat shield, the intake manifold and new SU carburetors fit perfectly.


As a part of the alteration, another set of spacer blocks were added to the manifold.  


Rock-n-roll...
Tom McCurry
Tommy's Topless Cars
843.338.2253

Tuesday, May 12, 2015

BACK FROM THE PAINT BOOTH

Today we moved Morris back into the shop for assembly.


The bonnet and boot lid are stored in a safe location.


The engine is attached to the hoist and moved into position.


The engine and transmission are carefully fitted in the engine compartment.  


Finally, the engine is positioned and the mounts are fastened to the frame.


The assembly begins...
Tom McCurry
Tommy's Topless Cars
843.338.2253


Monday, May 11, 2015

ENGINE IS PREPARED FOR INSTALLATION

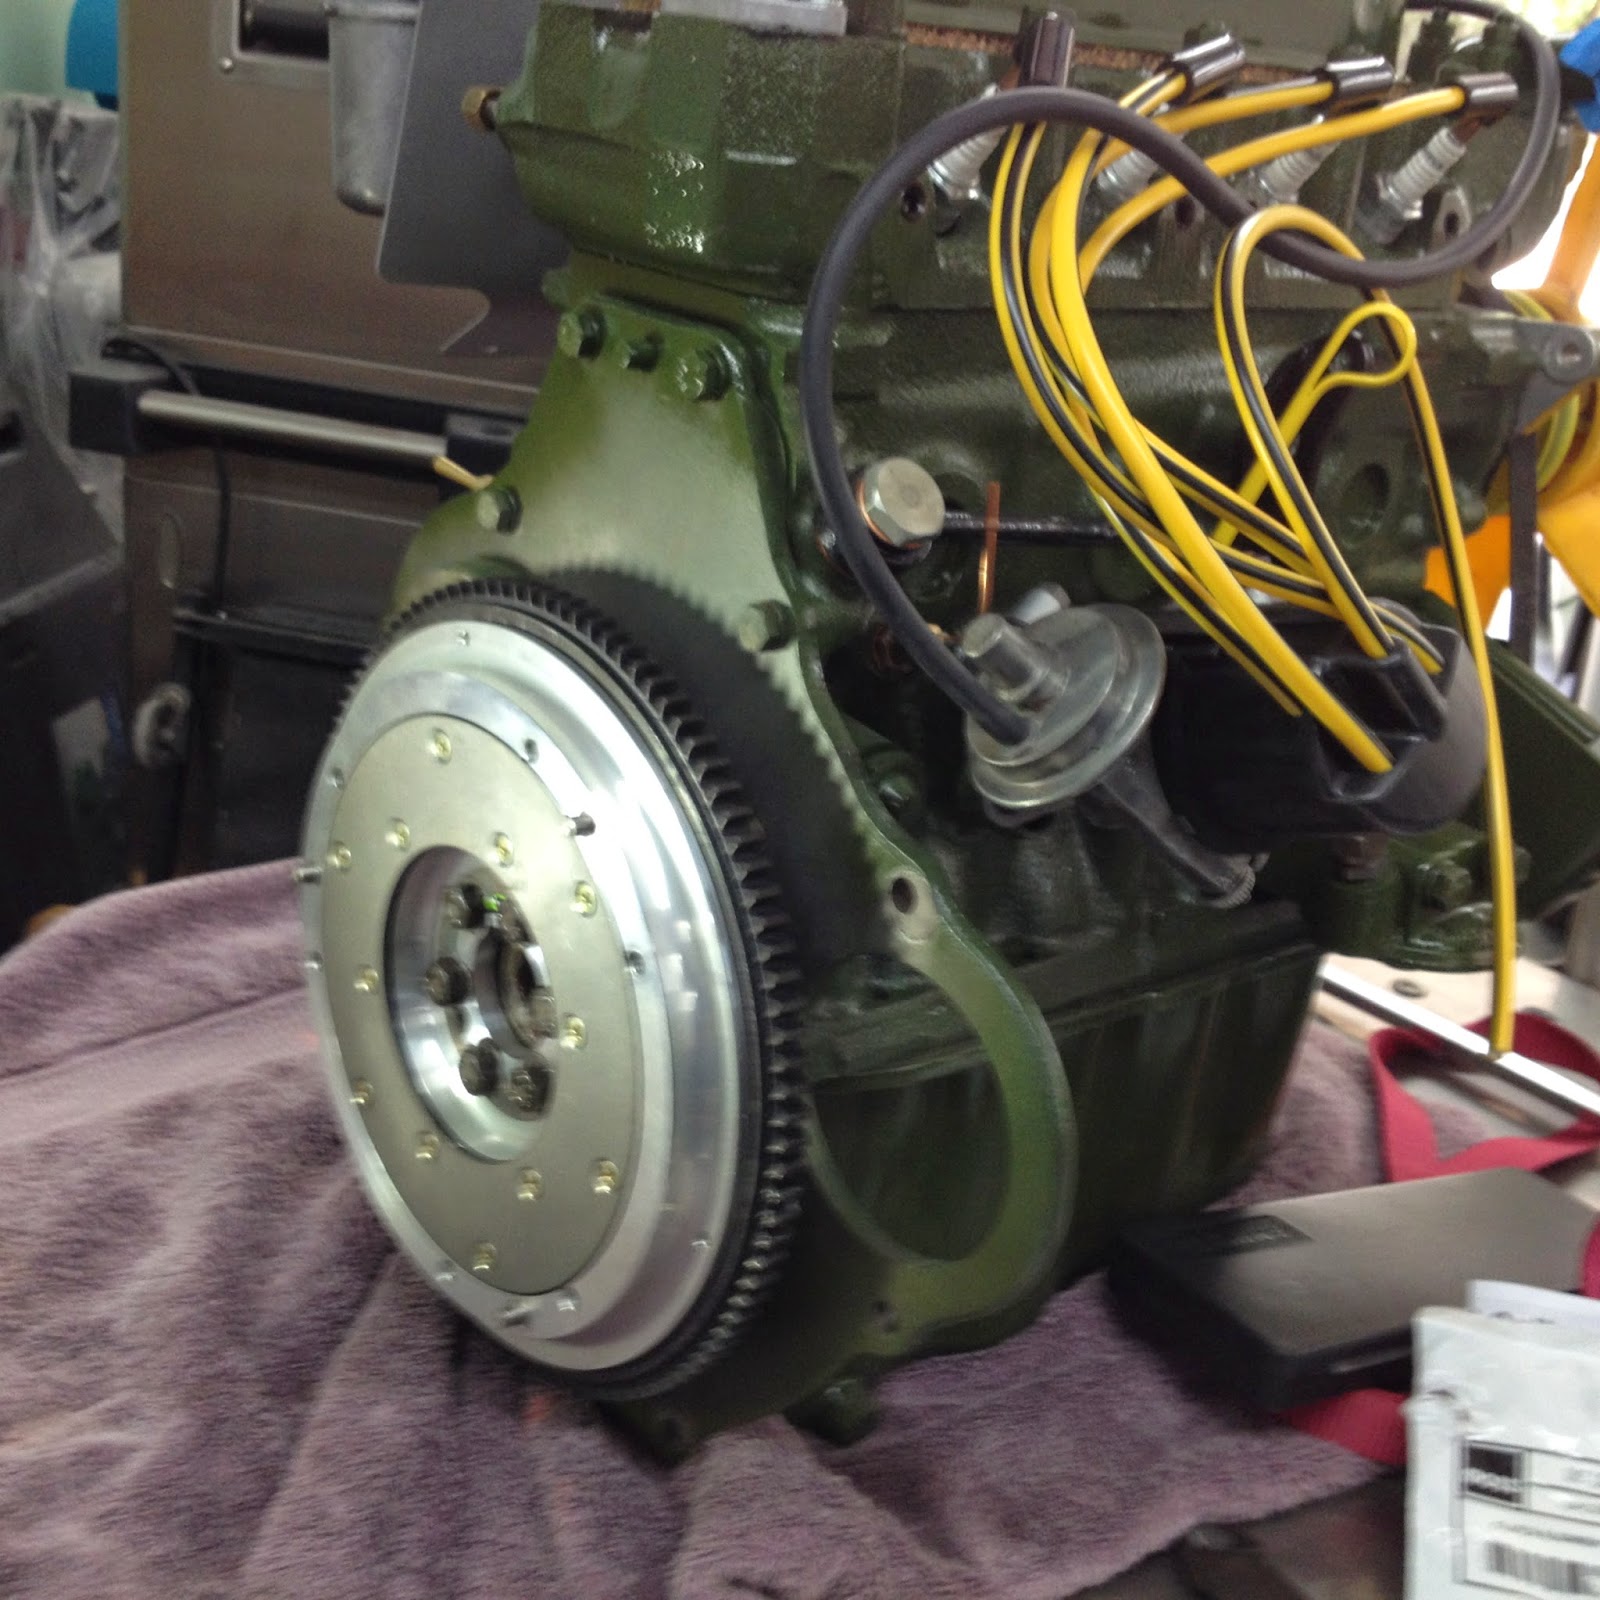
We have had the engine built and painted for some time now, but chose to leave it on the engine stand just for convenience.  When the engine is mounted on a stand, the flywheel and clutch assembly cannot be fitted because the stand is attached at the rear.


The engine is removed from the stand and placed on a table.  Then the aluminum flywheel is attached and the bolts are torqued to the correct specification.  Next the clutch assembly is fitted to the engine and the new release bearing is fitted to the transmission.


Then, the transmission is fitted to the engine and the new high torque starter is attached.
The engine and transmission assembly is now ready to be fitted to the car.


Stay tuned...
Tommy's Topless Cars
843.338.2253