THIS BLOG IS DEDICATED TO THE PRESERVATION AND RESTORATION OF BRITISH AUTOMOBILES

Saturday, January 17, 2015

BODY WORK BEGINS WITH THE BOOT


 After removing the trim from the boot lid, a closer inspection revealed some previous body damage.  


The chrome plated emblems shown in the photo to the right are in exceptional condition and will be reused.  The rubber weatherstrip was easily removed with a small putty knife.  I will bag and tag a sample of the strip to make sure the new one is the same profile.
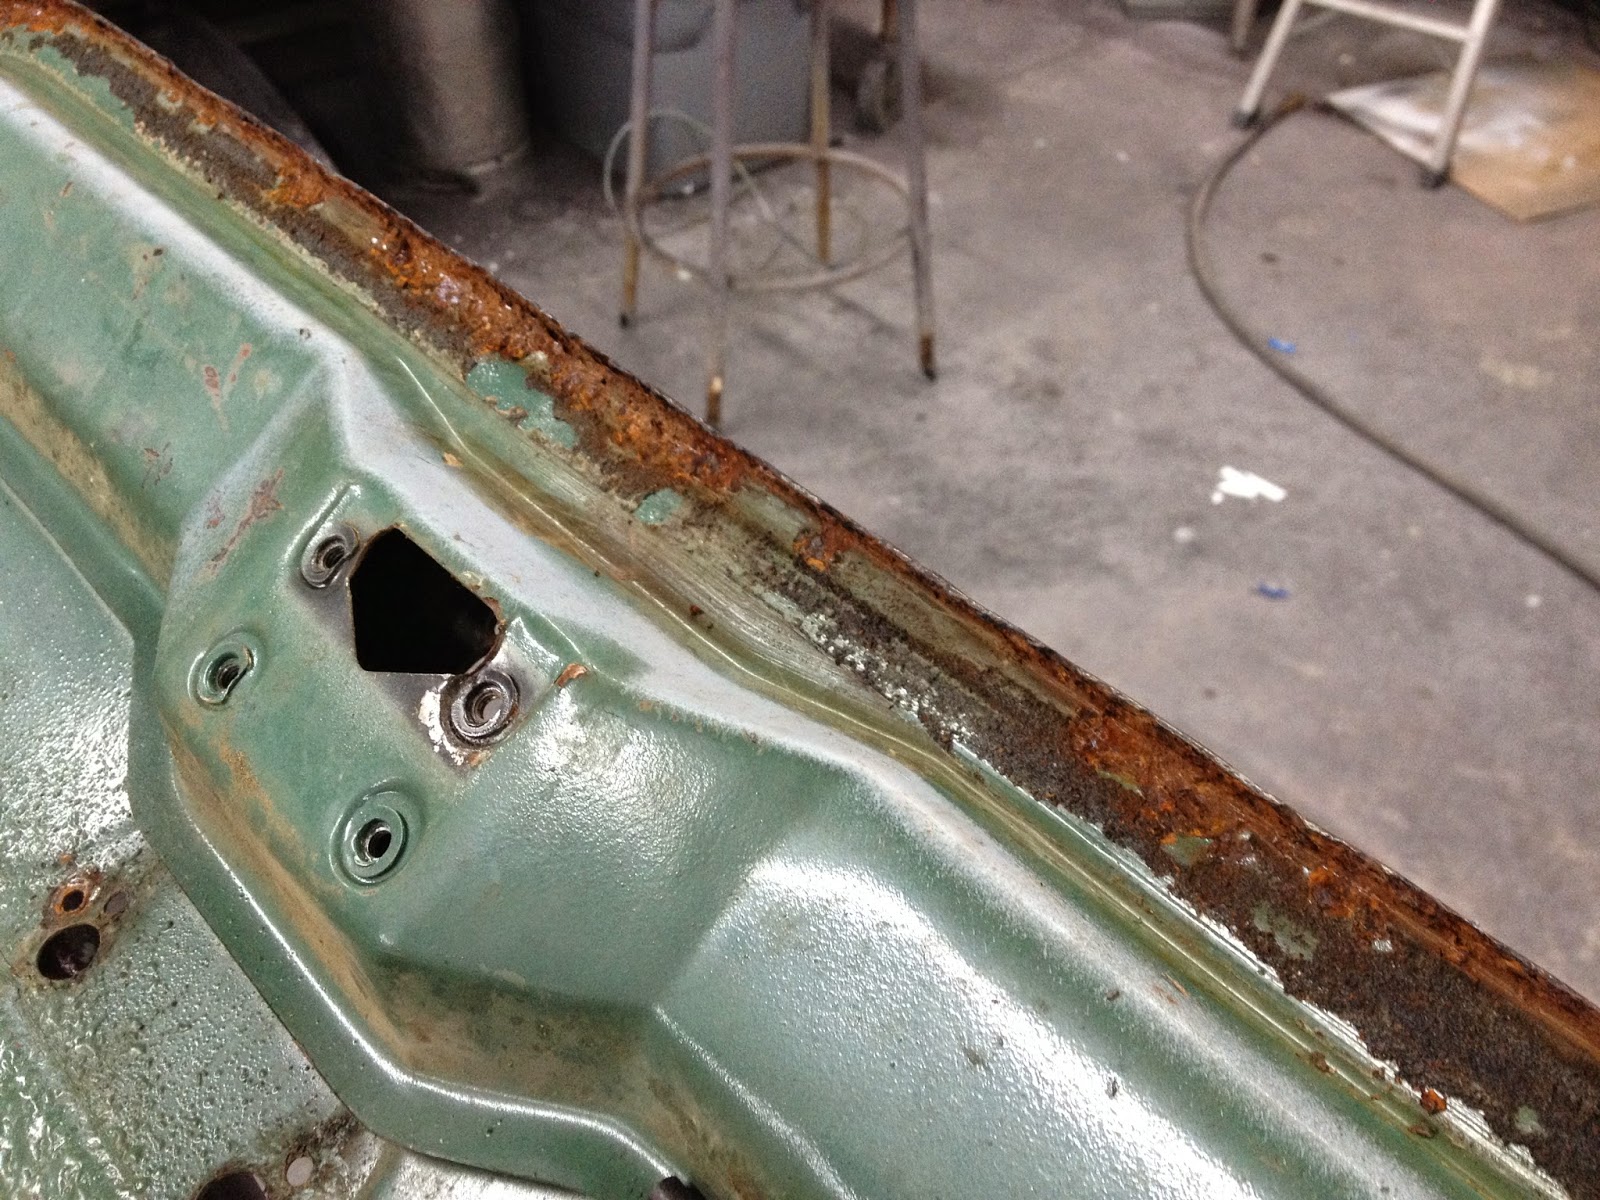


The photo to the left shows the source of the damage...rust.  The rust began because the weatherstrip around the inside perimeter of the lid retained moisture and promoted rust. We will sandblast and treat the affected areas with a rust converter and encapsulator before priming.


In the photo to the right you will notice six small black clips on the edge of the frame of the lid.  These clips hold the license plate lamp wire in place.  I photographed them to assure proper placement during the assembly process.  
You will also notice the factory applied undercoating on the inside of the lid.  


You can't take too many photos...
Tom McCurry
Tommy's Topless Cars
tommystoplesscars@yahoo.com
843.338.2253

Friday, January 9, 2015

BODY WORK PREPARATION

Morris's body is in excellent condition with only minor dents.  The body had been painted some years ago and that paint must be removed entirely.
But before any sanding begins, the engine compartment must be cleaned and degreased.  We will use Tide laundry detergent and a pressure washer.  
The wiring harness, voltage regulator and fuse block will be sealed in a plastic bag.  The harness seems to be in good condition so it will probably be reused.


Bill has expressed a desire to help with the bodywork so he will be doing most of the initial sanding.  This will be done with 40 grit wet or dry paper.  After the sanding is completed, the body will be coated with polyester primer.  This will be a good base for the body repair process.

Thanks for your interest...
Tom McCurry
Tommy's Topless Cars
843.338.2253

Thursday, January 8, 2015

THE NEW ENGINE

As we discussed, the original 1098 cc engine will be replaced by a high performance 1275 cc engine from a MG Midget.  Today Bill and I delivered the 1275 to Performance Machine Service in Jacksonville, Florida.  These guys are a class act with years of experience in engine building.  
My "in house" engine builders, Paul and Ron, found the 1275 donor engine to be slightly "out of tolerance".  PMS will be boring the cylinders to 20 thousandths over standard, installing new camshaft bearings and making necessary repairs to the cylinder head.  The final assembly will be done in our shop.
Jacksonville is about a 3 hour drive from Hilton Head, so Bill and I had an opportunity to discuss the Morris restoration as well as how blessed we were to have such wonderful, beautiful, understanding and tolerant wives.

We love our wives...
Tom McCurry
Tommy's Topless Cars
tommystoplesscars@yahoo.com
843.338.2253

Wednesday, January 7, 2015

ENGINE AND TRANSMISSION REMOVAL

Today we removed the engine and transmission.  No, Glenn isn't napping again.  He's removing the fasteners from the transmission mount.  


While the final disconnections were being made, I moved the engine hoist into place and made the necessary attachments to the engine.  The engine and transmission will be extracted from the car simultaneously.  


After the wiring, hoses and mounts were disconnected, the removal process took only a few minutes.  In the photo to the left, you will see that the engine and transmission has been positioned on a rolling platform so it can be moved aside.  It may be necessary to reuse some of its parts when we assemble the new engine.


Moving right along...
Tom McCurry
Tommy's Topless Cars
tommystoplesscars@yahoo.com
843-338-2253

I welcome your questions and comments.

Tuesday, January 6, 2015

REMOVAL OF INTERIOR

Today Glenn and I moved "Morris" into the mechanical area.  We began by removing the seats, carpeting and transmission tunnel in preparation of engine extraction.  Shown in the photo to the right, the removal of the interior components revealed an almost pristine floor pan.  There was some surface rust underneath the pedals.  This area is particularly prone to rust because it is frequently subjected to moisture.


The transmission tunnel, shown in the photo to the left, also shows signs of surface rust but this part will be sandblasted and refinished.


After removing the tunnel, the transmission mount was easily dis-connected. 


In the photo to the left you will notice the master cylinder cover plate, which is adjacent to the transmission tunnel, has been removed.  Maintaining fluid level in the master cylinder is done by lifting the carpet which exposes a rubber plug.  Removal of the plug allows access to the filler cap.


The engine and transmission are now ready to be removed from the Morris.

Stay Tuned...
Tom McCurry
Tommy's Topless Cars
tommystoplesscars@yahoo.com
843-338-2253


Wednesday, December 31, 2014

ENGINE REMOVAL PREPARATION

The next step is to remove the engine and transmission.  The preparation is fairly simple.  The radiator and associated hoses were removed with the grille surround.  
In the photo to the left, Glenn is removing the fasteners from the motor mounts.  


You will also notice the orange heater hoses, shown above, have been disconnected from the engine.  The starter wire, coil wires and accelerator cable have also been removed and labeled.  Now the Morris will be moved to the mechanical area for the removal of the engine and transmission.  The hydraulic hoist will be connected to the engine block and the eight bolts securing the transmission mounts and drive shaft will be removed.  The engine and transmission can now be removed as one unit.

Exciting stuff...

Tom McCurry
Tommy's Topless Cars
tommystoplesscars@yahoo.com
843-338-2253

Monday, December 29, 2014

DISMANTLING CONTINUES

Glenn and I spent the day removing exterior body fittings in preparation of body work and engine removal.  In the photo to the right, I captured Glenn removing the grille surround...or maybe he's taking another nap.  It's difficult to tell at his age.  
The radiator is actually mounted to the grille surround.  Both assemblies are easily detached by the removal of the 16 bolts and screws securing them to the body.


The photo to the left shows the front of Morris with the grille surround removed.  Now the engine and transmission can be removed easily through the front of the car.  Amazingly, only one fastener was damaged during the dismantling process.


The boot, taillights and rear bumper have been removed.  


The bonnet, boot and grille surround, shown in the photo to the left, are in extraordinary condition.  Very little body work will be required.  This may be the easiest restoration ever...I may regret that statement.


Stay tuned...
Tom McCurry
Tommy's Topless Cars
tommystoplesscars@yahoo.com
843.338.2253


Saturday, December 27, 2014

THE NEW ENGINE

As I explained earlier, the existing 1098 cc engine, will be replaced by a 1275 cc motor from a MG Midget.  Yesterday, my engine builders, Paul and Ron came by the shop to investigate the "new" engine.  They found the motor to be suitable for rebuilding.  The only issues they found were the cylinder tolerances.  The bore exceeded allowable tolerance by several thousandths of an inch in two of the cylinders.  The rebuilding process will now include boring the cylinders to .020" over and replacing the pistons and rings.  The crankshaft and camshaft are within tolerance. 
 New bearings for the mains, cam and rods will be fitted.  Also, the cylinder head will be reworked with hardened valve seats to allow the use of unleaded fuels without damaging the valves.  
The "new" engine will be transported to the machine shop next week.  The machining process will take about two weeks.

Tom McCurry
Tommy's Topless Cars
tommystoplesscars@yahoo.com
843.338.2253

Wednesday, December 24, 2014

ITS ALL ABOUT CONDITION

I find it exciting when I discover an older British automobile in this condition.  Most of the cars of this vintage are usually consumed by rust and corrosion.  The more I uncover on the Morris, the more intrigued I become.
 As an example, in the photo above, you will notice the white "box" in top-center.  The box, made of plastic (obviously "aftermarket"), is located in the battery box.  When I saw it, I assumed it was a feeble attempt to repair damage caused by acid fumes from the battery.
As I removed the plastic box, I was amazed to find a pristine original sheet metal battery box with the original rubber shield.  The more I see...

I remain impressed,
Tom McCurry
Tommy's Topless Cars
tommystoplesscars@yahoo.com
843.338.2253

PS  I will try to post everyday as the work progresses.  However, during the Christmas Holiday, I will be spending most of my time with my family.  Merry Christmas and may God bless you.

Tuesday, December 23, 2014

DISMANTLING BEGINS

Our day began by trouble-shooting the electrical system.  Before the restoration begins, it is important to determine if all the electrical systems are operational.  Fortunately, after removing the corrosion from the electrical connections, most of the circuits performed properly.  The horns and the interior dome light were the exceptions.  Again that may be due to faulty connections.  These issues will be addressed later.
Following the electrical trouble-shooting process, the dismantling begins.  It is extremely important to place every part that is removed in a plastic bag along with its fasteners and label them as to location and condition.  If the quality or functionality of the part is questionable, it should be listed as such.  
In the photo to the right you will notice the removal of the hood and front lighting lenses and trim.  The trim was also removed from the hood.  Some of the fasteners retaining the front light fixtures were difficult to remove and rather that break them, they were coated with penetrating oil for easy removal tomorrow.  We try to reuse all the original parts if at all possible.


We also removed the windshield wipers and radio antenna.  Lori and Bill wish to eliminate the radio entirely.  
Tomorrow the dismantling process will continue.


I love this car...
Tom McCurry
Tommy's Topless Cars
843.338.2253

PS  If you have questions or comments, please feel free to comment.